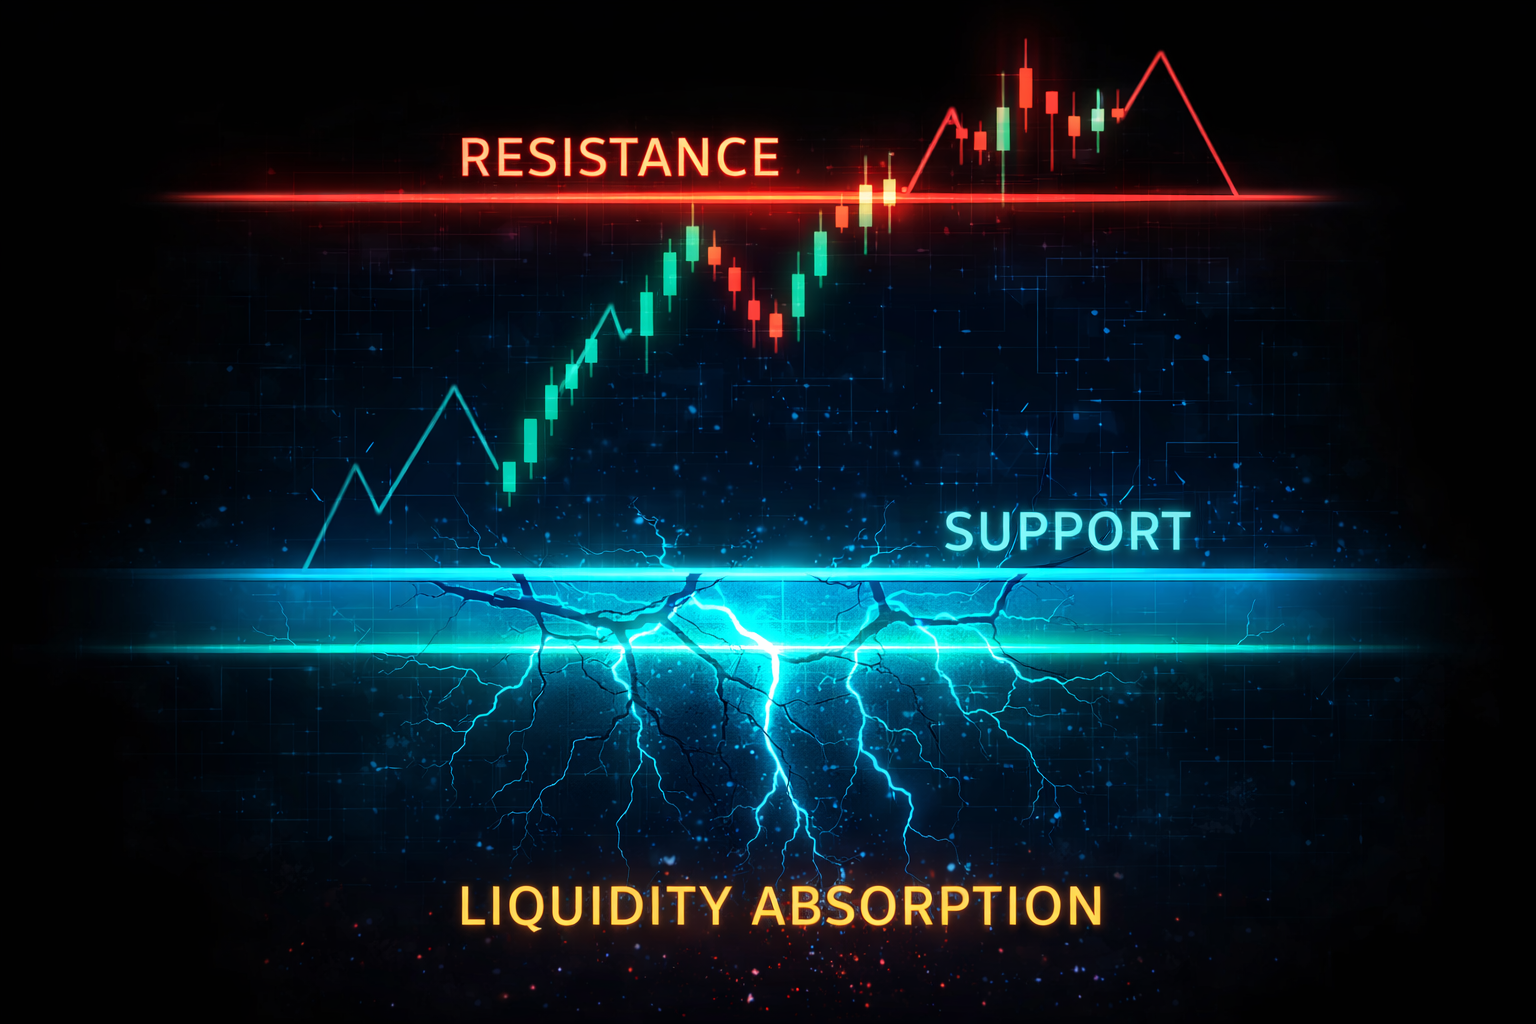
If you look at any price chart, you will notice that price does not move randomly like a drunk person stumbling home. It moves, pauses at certain levels, reverses, moves again, and often respects the same invisible barriers repeatedly. These barriers are Support and Resistance levels—areas where the balance of power between buyers and sellers consistently shifts.
Support and Resistance is one of the oldest and most fundamental concepts in technical analysis, yet most beginners get it completely wrong. They draw 50 lines on their chart connecting every single wick and minor pause, creating a "Spaghetti Chart" where price is always touching something. Every small pivot gets a line. Every wick gets marked. The result is analysis paralysis—a chart so cluttered that no level has any meaningful predictive value.
To trade like a professional, you must understand the Psychology behind the level—not just where price turned, but why it turned there. Price respects certain levels because those levels represent areas where a massive amount of money changed hands in the past, leaving one side trapped in losing positions and the other side victorious. These trapped traders remember the pain. They want revenge, or at least to escape at breakeven. This collective memory of thousands of traders creates the "invisible wall" that influences future price behavior.
1. The "Memory" of the Market
Why does price bounce at the same level twice? Why would a random number on a chart have any significance at all? The answer lies in human psychology and the collective memory of market participants.
Imagine Bitcoin hits $30,000 and bounces strongly to $35,000. That $30,000 level is now burned into the memory of everyone who was watching or participating. Let's examine what each group is thinking:
- The Buyers (Winners): They bought at $30k and are now sitting on nice profits at $35k. They are happy, but they also have regret—they wish they had bought more. If price ever comes back to $30k, they promise themselves they will double down on their position. "I should have bought more at $30k" becomes "I WILL buy more if it gets back to $30k."
- The Sellers (Losers): They sold or shorted at $30k, thinking it would go lower. Now they're trapped in a losing position as price rises to $35k. They are in pain. They pray every night for price to come back to $30k so they can exit at "Breakeven" and escape the torture. To close a short position, they must Buy. So they have Buy orders waiting at $30k.
- The Sideline Traders (FOMO): They watched the bounce happen and missed it entirely. They're kicking themselves for not buying at $30k. They are now waiting impatiently for a retest so they can finally enter. They have Buy orders ready at $30k.
When price returns to $30,000, all three groups—winners adding, losers covering, and sideliners entering—BUY simultaneously. This convergence of demand creates a massive wall of buy orders, causing the Support level to hold. The level "works" not because of magic, but because of predictable human behavior.
2. Zones vs. Lines (Precision is a Myth)
Here's a truth that will save you countless stop-outs: price is messy. Markets are not precise machines. Price rarely turns at exactly 1.50000. It might turn at 1.4995 one time, 1.5003 the next, and 1.4988 the time after that. If you draw a thin line at 1.50000 and place your stop loss one pip below it, you will get stopped out by wicks constantly—even when the level ultimately holds.
Professional traders understand this. They don't draw lines; they draw Zones of Interest—areas where they expect a reaction, not exact prices where they expect perfection.
How to Draw a Zone Properly
Do not just connect the wicks with a thin line. A proper zone covers the entire area of struggle—where orders were actually executed:
- Identify the Swing Point (the V-shaped reversal or pivot).
- For a Resistance Zone: Draw a box from the highest wick (the extreme rejection point) down to the highest candle body close (where committed sellers defended).
- For a Support Zone: Draw a box from the lowest wick (the extreme rejection point) up to the lowest candle body close (where committed buyers stepped in).
This zone covers the entire area where orders were executed. Price can enter the zone and still respect it—you don't need perfection.
This approach gives your trades room to breathe. Instead of getting stopped out by every wick that pokes through a line, you wait for price to close through the entire zone before admitting defeat.
3. The S/R Flip (Change of Polarity)
This is arguably the single most powerful and reliable setup in Price Action trading. Once you understand it, you will see it everywhere—and you will wonder how you ever traded without it.
The principle is simple: "Old Resistance becomes New Support" and vice versa. What was once a ceiling becomes a floor. What was once a floor becomes a ceiling.
Imagine a ceiling made of thick glass. You throw rocks at it repeatedly. Each rock represents a rally attempt that gets rejected. Eventually, with enough force, the glass shatters (Breakout). Once you climb up through the hole and stand on the glass frame, that same barrier that blocked you from above is now supporting your weight from below. The ceiling has become your floor.
Why does this happen? (The Psychology)
When price breaks through Resistance, the Sellers who were defending that level are now Trapped in losing short positions. They sold expecting price to reject and fall—instead, it broke through and kept going. They are in pain, watching their losses grow.
When price eventually pulls back down to retest the broken level, these trapped sellers finally see an opportunity to escape. They close their losing shorts by buying (Buy to Cover), hoping to get out at breakeven or a small loss. Meanwhile, the buyers who missed the initial breakout see this retest as a second chance to enter. Both groups create buying pressure at the old Resistance level, which transforms it into new Support.
The same logic applies inversely: when Support breaks, trapped buyers who refused to sell become desperate to exit on any rally back to the broken level. Their selling pressure turns old Support into new Resistance.
4. The Myth of "The More Touches, The Better"
Read this section carefully, because most trading textbooks, courses, and YouTube videos get it completely wrong—and following their advice will cost you money.
Traditional view (Wrong): "This support has been touched 5 times without breaking, so it must be very strong. I should buy here confidently."
Professional view (Correct): "This support has been touched 5 times. That means five waves of buyers have already stepped in at this level. Their orders are consumed. The demand that was defending this level is exhausted. It is now weak and likely about to break."
Think of a Support level like a wooden door and each test as a kick. The first time you kick the door, it holds firm—the hinges are strong, the wood is intact. The second time, it shakes a little. The third time, you hear a crack. The fourth time, the frame splinters. The fifth time, your foot goes right through it.
Each test of a level absorbs some of the orders defending it. Fresh levels—those that have never been tested—have all their orders intact and waiting. They provide the strongest reactions. Stale levels—those tested multiple times—have had their orders consumed and are liquidity pools waiting to be raided by Smart Money who know retail traders are blindly buying "strong support."
Summary
Support and Resistance are the fundamental framework upon which all price action analysis is built. They represent the collective psychology of market participants—the memory of past battles, the scars of trapped traders, and the anticipation of those waiting for another chance.
But remember: these are not concrete walls. They are dynamic zones of liquidity that evolve and weaken over time. Fresh levels are strong. Stale levels are weak. Keep your charts clean—mark only the Major Swing Points visible on the Higher Timeframe. If you have to squint, zoom in excessively, or debate whether something is a level, it's not significant enough to trade. The best levels are obvious to everyone, which is precisely why they work.